Chapter Titles, Parts, and Section Headings
Headings include Part Titles, Chapter Titles, and Section Headers.
Chapter Titles
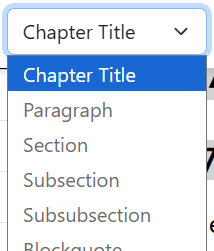
Access Chapter Titles in the Content Styles dropdown
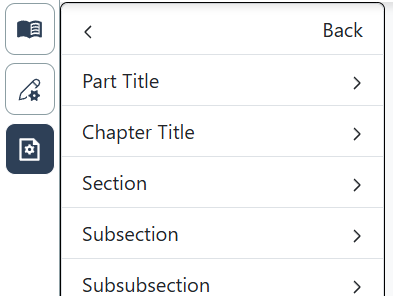
To change style options for Chapter Titles, click on the Project Settings button 

Next, click on Chapter Title.
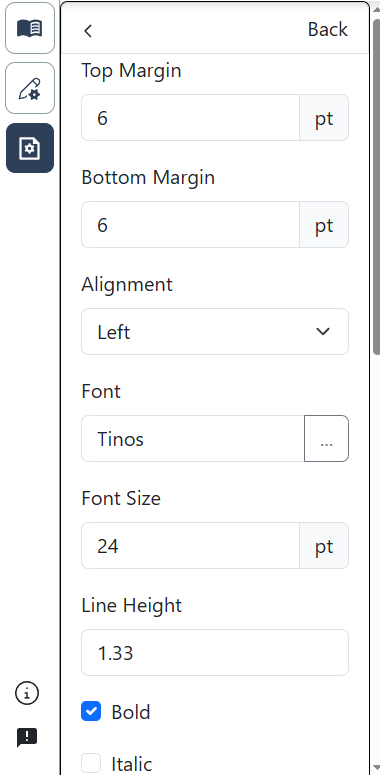
Chapter Titles can be customized in a number of ways, including single-line and multi-line titles, and with or without chapter numbers. Each title component can also be customized with different fonts, font sizes, top and bottom margins, alignment, amount of indent, and more.
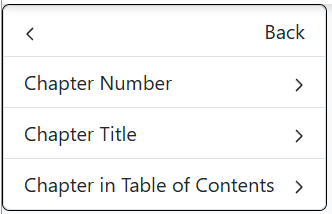
For a single-line Chapter Title, click Chapter Number.

Check to see that the option under the Number dropdown is set to Inline (this should be the default).
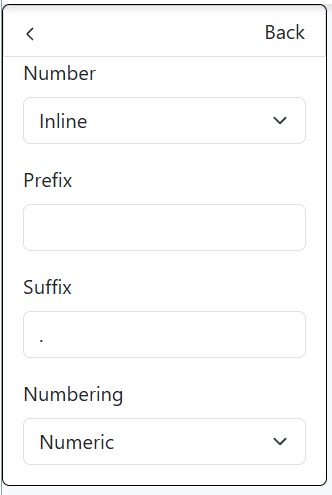
Use the Prefix and Suffix to add information before or after your title. If using global project settings, these will show up in each chapter. Leave blank if you do not wish to add any additional information to your Chapter Title.
To create a multi-line title, click Chapter Number.
Then click the Number dropdown box and change the option to Multiline.
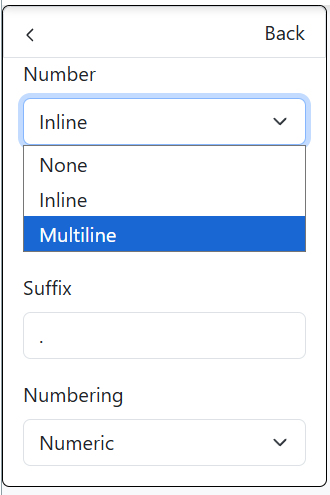
Use the Prefix box to add any text of your choosing before the chapter number. Likewise, use the Suffix box to add any text after the chapter number.
Note that the text you add as a Prefix or Suffix, plus the chapter number, will be included in the first line of your Chapter Title.
You can also change the way the chapter number is displayed. Click the Numbering dropdown box and change the format (formats include Numeric, Alphabetic, English Words, and more).

Various other settings can be changed in the first line of the chapter title, including font and font size, top and bottom margins, indentation, etc.
Multiline Chapter Title Example:

The Chapter Title menu option is used to set formatting options for the second line of the Chapter Title.

There are numerous formatting options for the second line of your chapter title as well, including top and bottom margins, alignment, font and font size, indentation, spacing, etc.
Section Headings
Access Sections Headings in the Content Styles dropdown.

Inkwell provides section headings, subsection headings, and subsubsection headings. You can set style options for these types of headings for an entire project or specific section headings through Local Settings.
To access Project Settings for Headings, click on the Project Settings button 
Parts
A Part is a widely used term in publishing to denote a major division of a book that groups related chapters. It implies a thematic or narrative unity within the section.
Example: "Part One: The Awakening" containing Chapters 1–4.
To divide your book into parts:
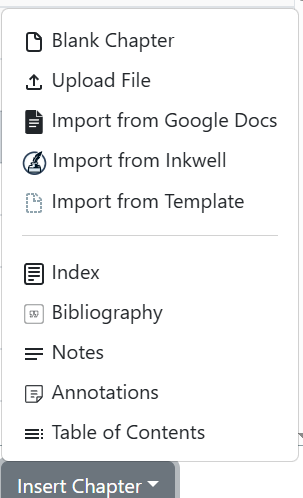
Insert a Blank Chapter by clicking on the Insert Chapter button at the bottom left corner of the screen
Click on Blank Chapter
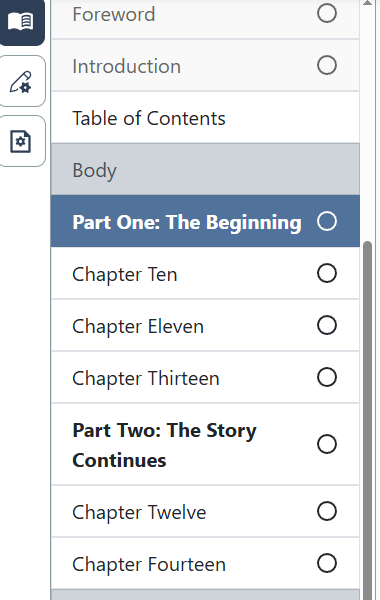
The new chapter will be inserted after the last chapter in your book. To move it, just click on the Part and drag and drop it into place.
Give the Part a title. Terms that are typically used for these major divisions within a book include Part, Section, Book, Act (for plays), or even Division, Segment, Volume, or Arc.
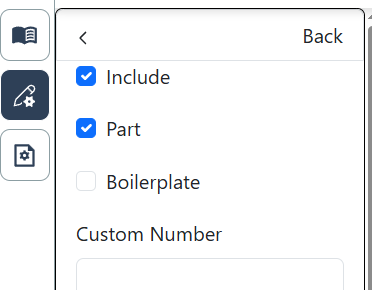
Click on the Local Settings button on the left side of the screen (beneath the Chapters button)
Click on Chapter
Click on Part
Navigate to the Chapters List. You will see the new Part, with chapters beneath it. To create the next Part, follow the same procedure as above, and move the new Part to the correct place by clicking on it and dragging it to reorder the chapters, as described above.