Manage Chapters and Sections
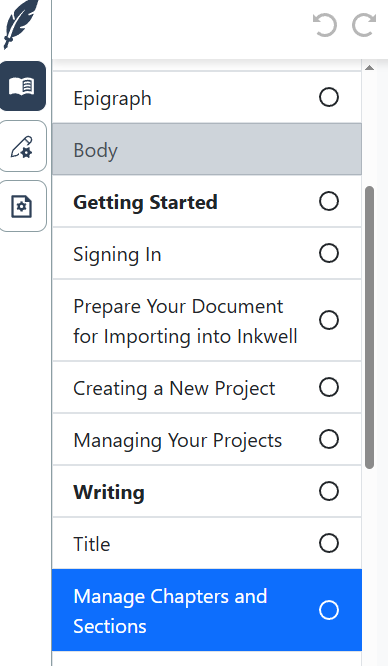
On the left side of the main Inkwell editing interface, there is a list of chapters or sections from your current project. Click on the sections or chapter you want to edit.
Note that if the list of chapters is not currently visible, you can click on the Chapter List button on the left side of the screen:
How to Insert a Chapter
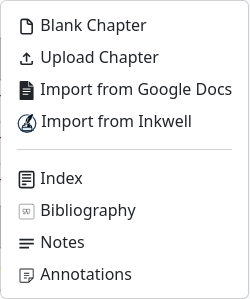
In order to a create chapter or section, click on the Insert Chapter button: 
The Blank Chapter option will create a new blank chapter
The Upload Chapter option will allow you to upload a chapter from your computer in formats like Word, LaTeX, Markdown, or Plaintext. It will be added as a section or chapter to your project in Inkwell
The Import from Google Docs option will allow you to import a document from your Google Docs account; it will be added as a section or chapter.
The Index option will add an index to your book.
The Bibliography option will add a Bibliography to your project, it will automatically include all citations made using the citation feature.
The Notes feature adds an endnotes section to your book. It will automatically contain all end notes.
Reordering Paragraphs
Once a chapter or section has been added to your project, you can drag and drop it in the list of chapters/sections to reorder and to move it between the main sections: Front Matter/Body/Back Matter.
Each chapter has a status indicator, a small icon on the right hand side to indicate the status. Click on it to alternate between three available statuses: ,
, and
. These exist to help you track of the status of the different parts of your project, to indicate progress in proofreading, or to identify sections that need further attention, etc.

